I have always dreamt about having my own shop on Etsy with my own handmade stuff on it and... *drums* ...NOW IT'S OPEN!!! It looks really funny now 'cause it only has one thing - funky slouchy beanie hat I finished few days ago. And it's only £25 (who knows, there might be a sale!)!
[NOTE: If you live in Lithuania, and want me to make one like this for you just write a comment under this blog post and we'll make a deal about it. ;} OR visit my shop]
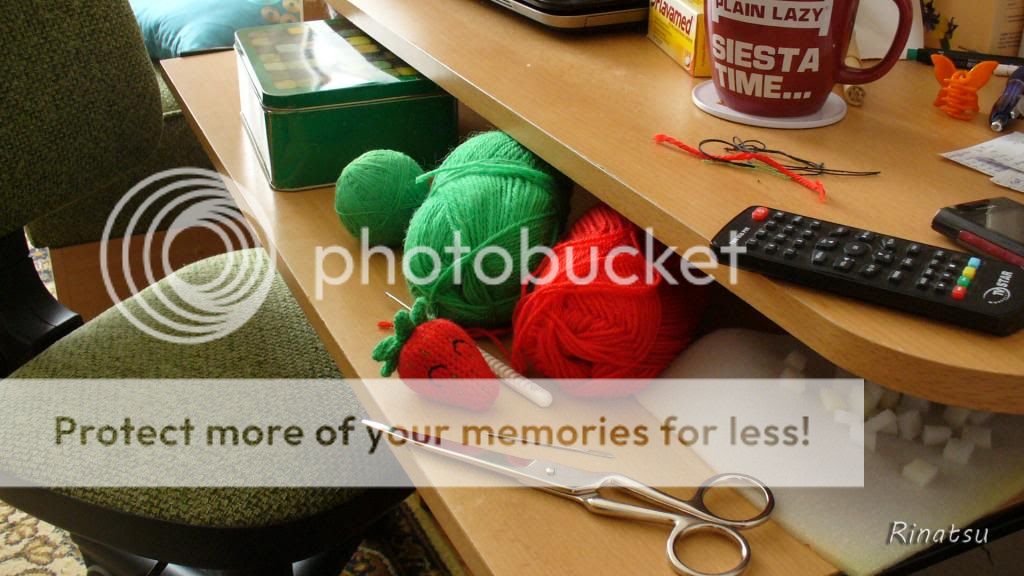
It's been eternity since I posted some serious DIY post. And I already have a list of stuff I need to share tutorials of with ya! First of all: strawberry. (ノ◕ヮ◕)ノ*:・゚✧
Use a so called 'snail crochet', meaning that you must not connect rounds with slip stitches.
Abbreviations:
sc - single crochet
st - stitch
ch - chain
hdc - half double crochet
dc - double crochet
sc2tog - single crochet 2 stitches together
Strawberry
You can either make 5 or 6 cm long strawberry. If you want to make 5cm big strawberry skip the red part in the instructions.
6cm strawberry
5cm straberry (visibly smaller)
Make a magic ring and crochet 6 scs.
Round 1: Make 2scs in each st. [12sts]
Round 2: Work with sc in each st. [12sts]
Round 3: Make 2scs in every second st. [18sts]
Round 4: Work with sc in each st. [18sts]
Round 5: Make 2scs in every third st. [24sts]
Round 6-7: Work with sc in each st. [24sts]
Round 8: Make 2scs in every fourth st. [30sts]
Round 9-10: Work with sc in each st. [30sts]
Round 11: Make 2scs in every fifth st. [36sts]
Round 12-13: Work with sc in each st. [36sts] Round 14: Make 2scs in every sixth st. [42sts] Round 15-16: Work with sc in each st.[42sts] Round 17: Sc2tog every sixth st.[36sts] Round 18: Work with sc in each st.[36sts]
Round 19: Sc2tog every fifth st [30sts]
Round 20: Work with sc in each st. [30sts]
Round 21: Sc2tog every fourth st. [24sts]
Round 22: Sc2tog every third st. [18sts]
Round 23: Sc2tog every second st. [12sts]
Round 24: Sc2tog every st. [6sts]
Fasten off.
Leaves
Make a magic ring and crochet 6scs.
Round 1: *ch 6, sc 5 from the second ch* repeat 6 times
Round 2: *sc on the base, dc (starting going up), hdc, hdc, sc, sc, 3scs on the very top, sc, sc, hdc, hdc, dc* repeat 6 times
Fasten off
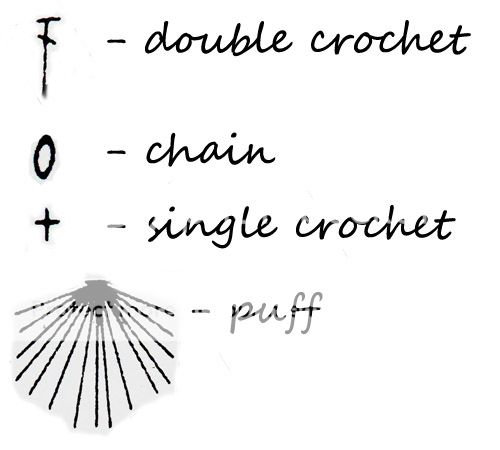
I have this scheme I drew. I knoooow it's really messy and complicated looking but I hope it will help at least a little bit!
Make a cute smiley face, attach leaves and you got cutie amigurumi strawberry!!
All credits go to me. No one helped me making this, it all came from my mind.
And now, lets enjoy those beautiful cuties. (^v^)
♥
I hope you enjoyed this DIY tutorial as well as the others I've shared with ya. If you have any questions, post a comment under this post. I'll be glad to help. (◕‿◕✿)
This week I'm staying at home 'cause I'm sick. Just a day ago I was just laying in my bed with fever not wanting anything but as I felt better day ago I started crocheting to keep myself busy and do what I always love to do. ♥
So I was just crocheting, chilling when this happened...
Not to mention that it's plastic end was already breaking off, it's head just...flew off!!! This is the first time when my crochet needle broke. This is insane! I just sat with my jaw open, couldn't understand what just happened...
When I gained back my consciousness I looked at the case it was in...
Seriously...? Made in Germany? Couldn't believe that German quality has tricked me this time...
Only good for the left case so I can put my GOOD QUALITY LOYAL crochet needles in it... ♥
I have to apologise my good old Japanese crochet needles of Tulip brand. I love you all so much... ♥
In fact, I even bought that broken crochet needle 4 times more expensive than my Japanese ones!!! щ(ಠ益ಠщ) This was probably my latest bought crochet needle and it broke fastest lol... Ugh, still can't believe this...
Good luck at buying proper and good quality crochet needles. Price doesn't reveal quality at all. What I learnt is that buying crochet needle with plastic end is a no no, and talk about ruined German quality... Lol no, just kidding guys, German stuff is good, just keep yourself with eyes wide open when buying stuff, especially from 'addi' brand...
[NOTE: If you live in Lithuania, and want me to make one like this for you just write a comment under this blog post and we'll make a deal about it. ;} ]
Hello people! This is my first post in 2012, I hope you had a nice celebration, made (or not) some New Year Resolutions to yourself and are happy to start a new year, new opportunity to try something new and improve yourself! ~~
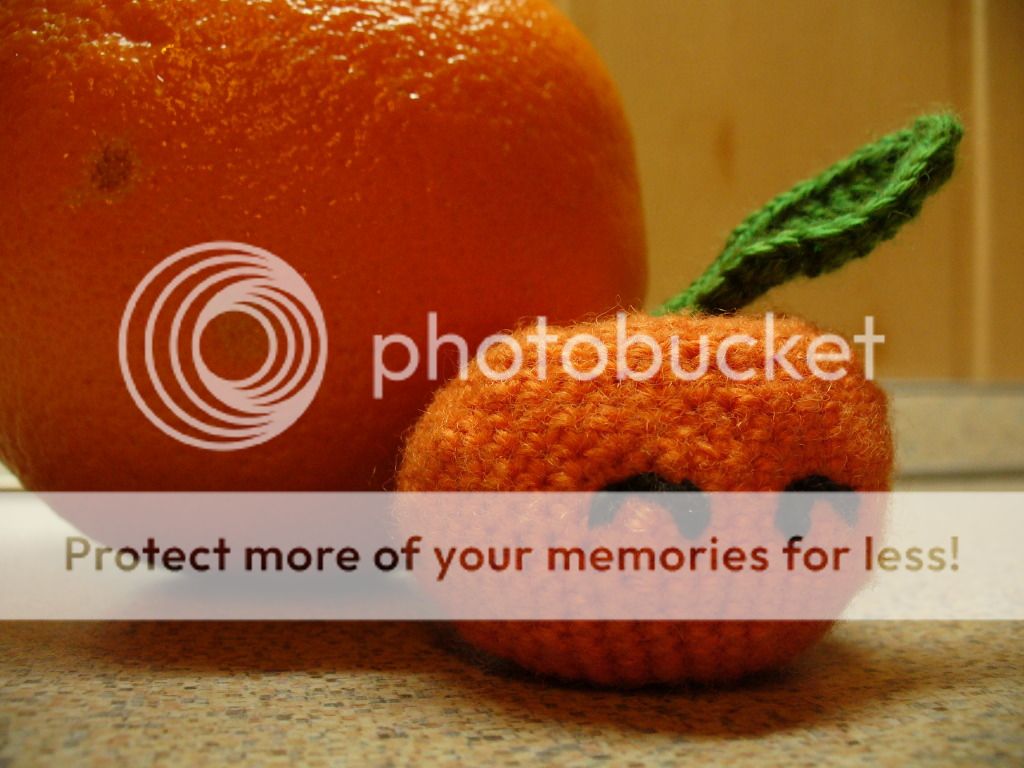
I decided to make a new DIY tutorial since I made a cute Amigurumi tangerine today. >w< The thought about making a tangerine went from the hate my boyfriend has for tangerines. XD So I decided to troll him a bit and make one. \(o ̄∇ ̄o)/
EDIT: I gave him this tangerine yesterday and he was so surprised! He kept giggling about the fact that I made it because he hates them...hahaha. XD
Tangerine
Use a so called 'snail crochet', meaning that you shouldn't connect rounds with slip stitches.
Abbreviations: sc - single crochet st - stitch ch - chain hdc - half double crochet dc - double crochet sc2tog - single crochet 2 stitches together
Make a magic ring and crochet 6 scs. Round 1: Make 2scs in each st. [12sts] Round 2: Make 2scs in every second st. [18sts] Round 3: Make 2scs in every third st. [24sts] Round 4: Work with sc in each st. [24sts] Round 5: Make 2scs in every fourth st. [30sts] Round 6: Work with sc in each st. [30sts] Round 7: Make 2scs in every fifth st. [36sts] Round 8: Work with sc in each st. [36sts] Round 9: Make 2scs in every sixth st. [42sts] Round 10: Work with sc in each st. [42sts] Round 11: Make 2scs in every sixth (again) st. [49sts] Round 12-13: Work with sc in each st. [49sts] Round 14: Sc2tog every sixth st. [42sts] Round 15: Work with sc in each st. [42sts] Round 16: Sc2tog every sixth st [36sts] Round 17: Work with sc in each st. [36sts] Round 18: Sc2tog every fifth st. [30sts] Round 19: Work with sc in each st. [30sts] Round 20: Sc2tog every fourth st. [24sts] Round 24: Sc2tog every third st. [18sts] Round 25: Sc2tog every second st. [12sts] Round 26: Sc2tog in every st. [6sts]
Don't forget to stuff it. But don't stuff too hard!! Because you want to make a little fold like this:
Fasten off when there's 6sts left.
Leaf
Chain 16. Sc in third chain from hook. Sc in next chain, hdc in next 2 chains, dc in next 4 chains, hdc in next 2 chains, sc in next 4 chains, 3sc in last chain. Opposite side. Sc in next 4 chains, hdc in next 2 chains, dc in next 4 chains, hdc in next 2 chains, sc in next chain, slip stitch in last chain.
[NOTE: If you live in Lithuania, and want me to make one like this for you just write a comment under this blog post and we'll make a deal about it. ;} ]
Another DIY blog post for all you crocheting lovers! ヾ(^∇^)
After I finished my new not-yet-shown-to-you-all warm cardigan I decided to take a break from crocheting or anything since I'm quite busy nowadays..buuuuuut..my boyfriend gave me an idea to make a winter hat. I, once again, gained inspiration and got so enthusiastic that I started searching for a pattern right away. I actually found a really nice slouchy hat pattern online here: http://www.caron.com/vickiehowell/patterns/urban_jungle/urban_jungle.html But once I started crocheting it, I saw that it's really..not winter hat at all. .-. It's full of holes and it's more like an accessory or a spring/autumn hat, not for keeping warmth.. (。・_・。)σ
I kept searching and searching but it was so useless that I ran out of patience. (ノಠ益ಠ)ノ So I opened my oldie book and searched for a good pattern myself! So this is what I got. You can actually say that it's my first work that I made just from my own head and inspiration! (ノ◕ヮ◕)ノ*:・゚✧
Slouchy winter hat side view
(oh yeah, you can notice difference in this photo, I'm not blonde anymore, I'm actually a redhead now but flash makes my hair kinda brown. (>ω<*)ノノ)
Here's a pattern for this hat:
I also thought about those girls (or maybe boys? haha) who don't understand these kind of patterns so here are some explanations:
For the very start I just knitted a simple stripe about 53cm long and connected it to make it round. After that I started making pattern from above. I kept repeating everything till the hat were about 28cm long. For the ending I used advices from Vickie Howell's slouchy hat pattern. Also, if you aren't sure how to make those puffs, please visit Vickie's pattern too. The only difference is that you need to make puffs from single crochets all around (as it is shown), not just from one single crochet. ☆ミ(o*・ω・)ノ
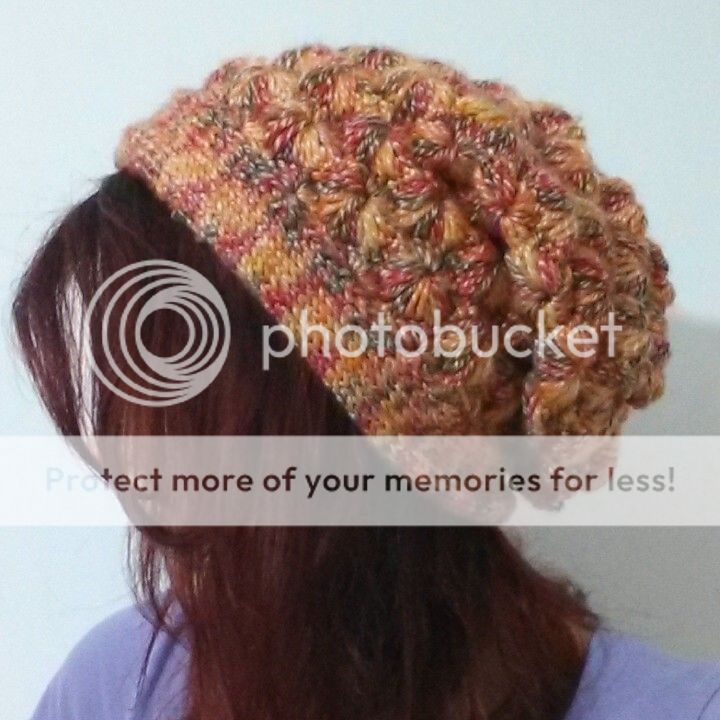
Winter Slouchy hat back view
Winter Slouchy hat pattern close up
This hat is soooo warm!! It took me few minutes to take these photos while me wearing it but it made me sweat right away haha. ( ゚▽゚)
Well, it took me about 4 days to make it and I'm really happy with my finished work. I think it looks perfect, so my boyfriend does. (ノ´∀`*)ノ
P.S.: If you are having trouble seeing squares instead of cute emoticons, then please visit my older post and download Japanese fonts. Since most of the symbols I used are supported by them. ^-^
I noticed that I haven't written any post about my life for rather l--o--n--g time. So the time has come. ;D
Top News about Rinatsulife
1. Love for Icicles
Spring has come!! Snow started melting!! And that's why it gave me awesome ability to fall in love with icicles. XDD
Awesome icicle on our neighbour's 'house' roof. I bet it's about 180cm long. 8D
And this is the view under the stairs. Haha.
Awesome, huh? ^-^
♥
2. First Flower
Two days ago (03.17) I saw first flower this year. :3
Beautifulness. ♥
3. Fake Lashes
Bought some Korean fake lashes but the glue won't work so I can't show the full look. u_u
Nevertheless, it looks pretty cool. ^^
4. Helix Piercing
I pierced my ear again. :3 I already have 1 lobe piercing in right ear and 2 lobe piercings in left. 03.05 I pierced helix (cartilage) in my right ear! ^-^ So now I have 4 piercings!! XD *cough* showing my awesome maths skills here... *cough*
5. Kawaii Family
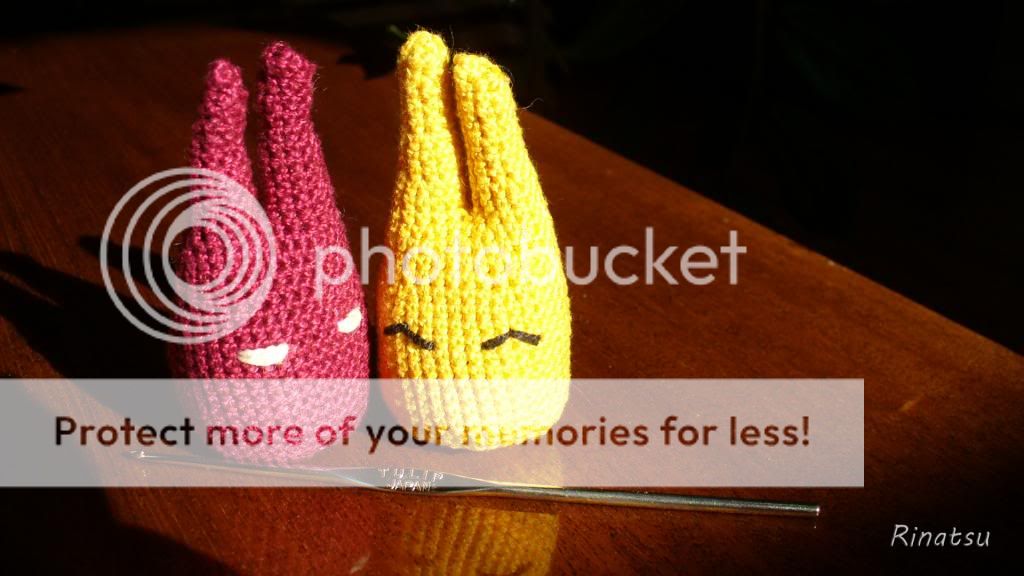
I've spent my last week making nonsenses. XD Wanna see the result? Here you go:
Hahaha. XD They are so cute and funny! You know what? I actually made a brand name for them. XDDD Maybe I'll start selling them or something. Hahahaha. XD I think I should post a DIY tutorial but you know how lazy I am. XD
6. Confidence and Loving New Me
Ever since I dyed my hair I've never been as happy about how I look as I am now. Because I started caring about myself more. Not only new hair does difference.
I started caring more about my skin, my diet (eating habits). Started drinking more water and eating more healthy food (although I stoppedeating unhealthy food long long time ago). So, I can actually say that it does it's thing after all. Even my hair started growing really good.
Went to dye my hair about a week ago. My hair dresser was amazed because when I dyed it for the first time (December, 2010) my hair looked TERRIBLE!!! Not only about hairstyle but also about health.
I ♥ my hair now. The colour is perfect and it is so healthy now too. All thanks to my hair dresser. :3 ♥
LOL at my cute ponytail. XD Took this about half hour ago. Haha.
7. Squirrel..?
Ok, don't mind this but I just had to show this bag to someone. XDDD
Awesome bag I got!!! When you are holding it, it looks like you are holding squirrel upside down. XDDDDD Okay, laughing attack much... XDD
8. Commercial Contest
Okay, this is not the first time for me participating in the contest but not this kind. My main idea was totally different but I wasn't able to do it because friend, who had to film me got sick so I made a new idea 3 days till the end, took all pictures needed 2 days till the end and made a video the last day. This is what I got!
Don't judge me much. ;_; I really tried. >< And these were just so cute I couldn't not show them to the world!!! ^w^ ♥
[EDIT: I didn't win anything. ;-; But it was worth trying. XD]
Yatta!!! It's the 4thdayofspring! Dunno how about you guys but my mood is getting better and better now. ^w^
Sorry for the delaying this blog post. But you know, the last year of school, lots of studying, tiredness and stuff. It really pulls my mood off. :/
I have finally finished my sweater!! (Don't remember? Crochet me please)
The neck and a cute ribbon. It's just adecoration, you don't need to put it if you don't want. :3
The sleeve:
Side view:
Front view:
Well, maybe it would look better on someone else. I look kinda fatty like that... ._.
The main thing you need to know about this sweater that it's made from little circles! The pattern is very simple:
Scheme instructions:
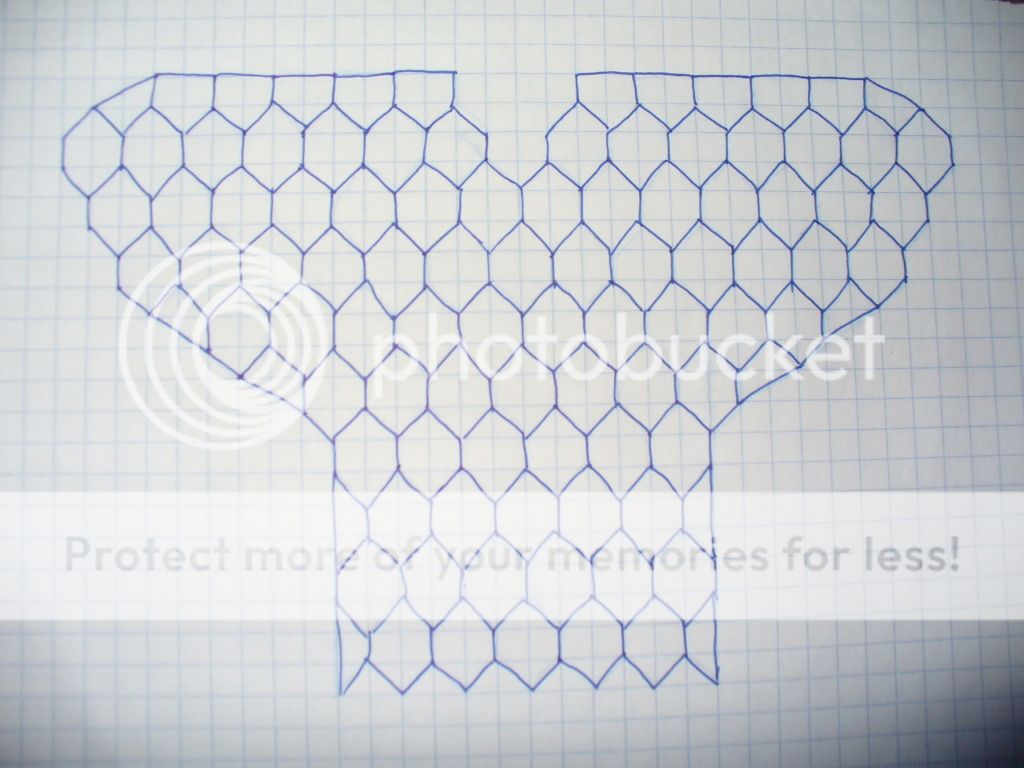
The next thing you need to make is a shape. Well, I can say that it's the hardest work because it took me a lot of time to manage the right shape by myself. :/ But you can look at my example. I don't recommend you doing your sweater exactly as I draw it because we girls all have different bodies so you can never be sure that clothes of your friend will look good on you as it looks on her. :3 Any ways, here's the example. ^^
Talking about threads... I took half wool. The very big advantage is that you can wear it on other sweater in contrast with different colour. It looks awesome like that! ^^ (tried brown under this)
Be creative, reach for your aim and make awesome stuff with your own hands!! :3 ♥
[NOTE: If you live in Lithuania, and want me to make one like this for you just write a comment under this blog post and we'll make a deal about it. ;} ]
~ ~ With scheme explanations! ~ ~
You all maybe have noticed that I'm very addicted to handmade stuff right now. XD When I'm so exhausted by all student dying..khem.. studying...the only thing that is left for me to relax is crocheting!~
While it's snowing as hell outside <(>_<)>, I'm wrapped in big sweaters and shawl, writing blog posts about DIY stuff. Of course I have a lot of magazines with bunches of schemes but I prefer to put only what I have already tried. ^^
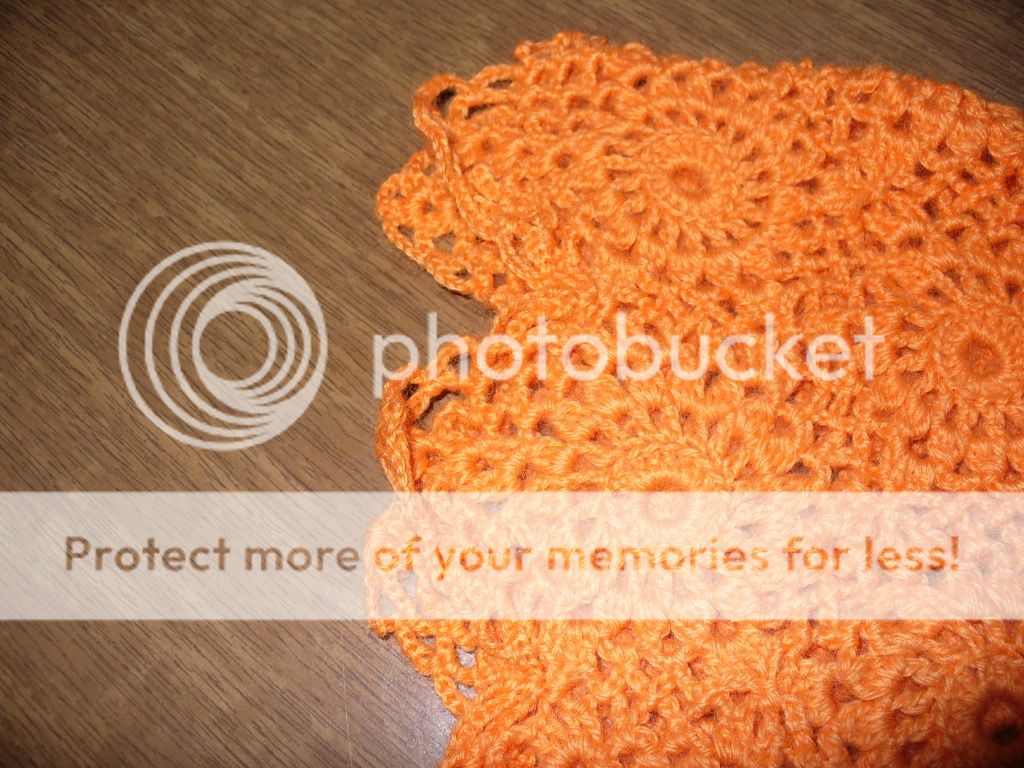
It's a very beautiful 50x50cm table napkin. Perfect for decorating little dark wood tables. Or anything you like! You can even give it to someone as a present!!~ I would love to get one like this from someone close! ^^ Here's a scheme for it. :3
Scheme explanation:
How to make a bud:
I used white cotton threads but you can use anything you like! ^^
~ ~ With scheme explanations! ~ ~ While surfing through my older posts I noticed one little thing I promised to do long time ago but didn't... ¬ ¬
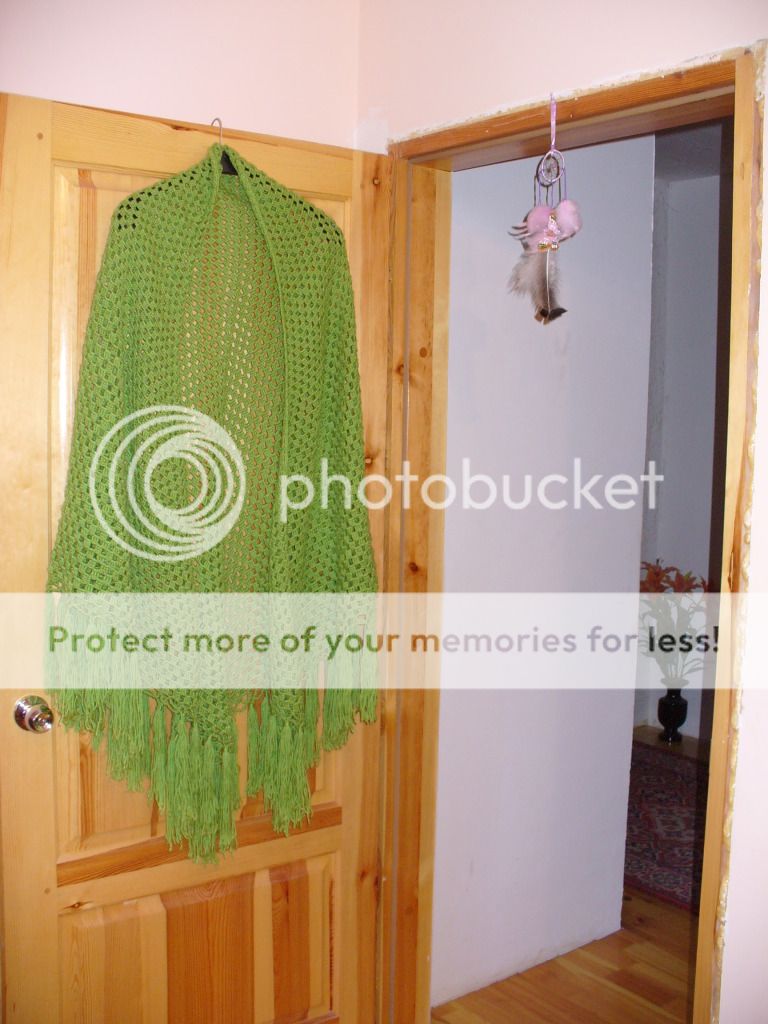
And I was thinking about taking photo of my shawl <...> that I have made long time ago but I was also too lazy <...> I will do that other day. <...> --- Crochet more please
Yeah, baka me. So I decided not just take a photo (which I already have) but also to make a DIY (Do It Yourself) blog post!~ ^w^ Yay for Rina!~
I am 176cm tall so you can see how big the shawl is. And yeah this is a very old photo since you can see that I'm still with my natural hair colour. XD
Close up of the pattern:
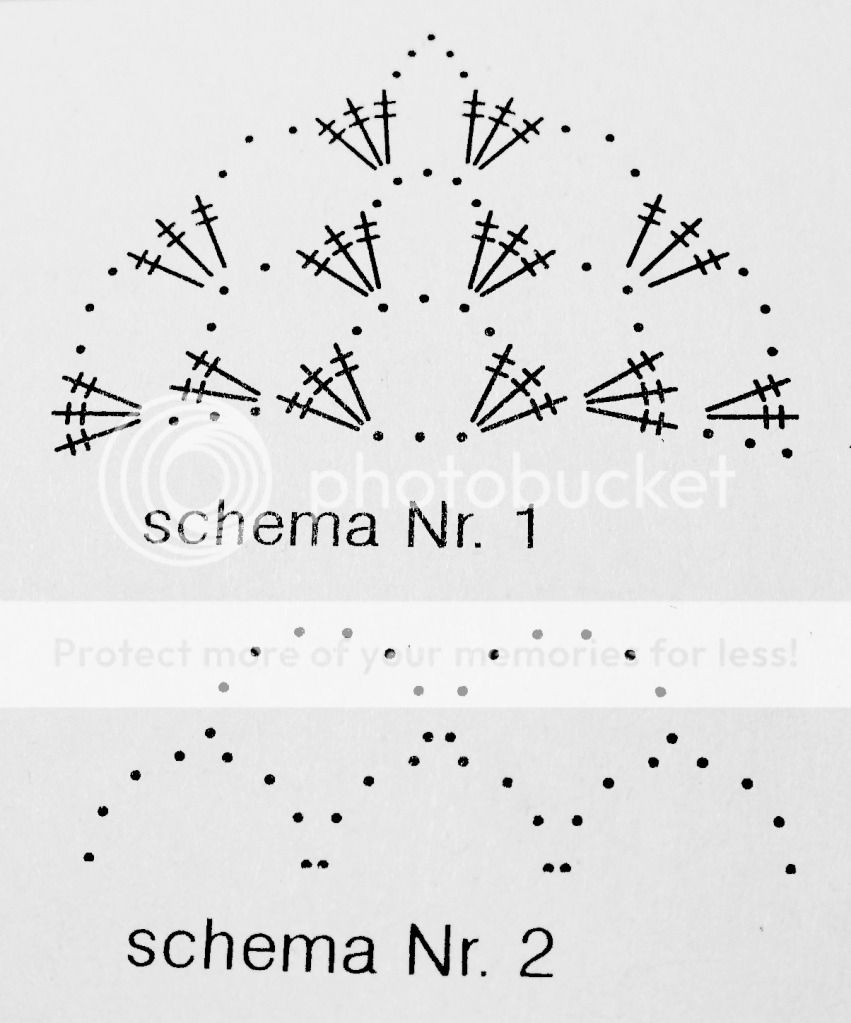
The pattern of this shawl is SUPER DUPER simple:
Scheme No.1 is for the main part of shawl. You start with 3 chains, follow the instructions and it gets bigger and bigger!
Scheme No.2 is for the end. You can make as many of these as you like. I made two lines and then I put fringes on every second loop.
Scheme explanations:
The main rules for making this are very short and clear:
The longer hair, the more vivid colour thread has, the longer fringes are - the more magnificent and fancy shawl is.
The shorter hair, the more simple colour - the more casual shawl is.
- - -
It took me whole summer to make this shawl. XD But the main reason was because shop ran out of yarns that I needed so I had to order and wait for them to arrive. XDD Actually it was good to have a few breaks during my work so I wasn't annoyed by it or so. :3
I really recommend you doing it if you love crocheting. Because most of the shawls I saw has very difficult patterns and everyone, really, EVERYONE can do this one without lots of hard work. :3
_zpst2b8rwri.jpg)